

In the next post I will show you how to install Python for Data science.
Python is the most used programming language in Data Science, then R follows. Thus, I'm going to show you how to install Python for Data Science.
What is python?
Python is a programming language interpreted whose philosophy emphasizes the readability of its code. It is a programming language multiparadigma, since it supports different programming paradigms; object orientation, imperative programming and, to a lesser extent, functional programming. Is a interpreted language, dynamic and multi platform. (Wikipedia)
What is Python for a Data Scientist?
Python is the main language a Data Scientist will have to grapple with to obtain, clean, process and take advantage of the data through prediction and / or classification algorithms.
Why a tutorial to install Python?
After three years of using Python, I think I have reached the best possible set-up and thanks to this I can be very efficient. Thus, Today I am going to share with you what steps I have followed to achieve this very productive environment.
There are several ways to install Python, including the one that will be explained in this Python tutorial + Jupyter Notebook + PyCharm. However, there is a well-known distribution called Anaconda, This is more recommended for beginners because it brings everything already configured, However, has certain incompatibilities with some packages for this reason, the installation explained below is preferred.
Note: This tutorial will explain how to install Python, Jupyter Notebook and PyCharm plus how to configure them correctly
Instructions
1Step:
Download the Python installer, recently the version has come out 3.9 of Python, However, many Data Science libraries are not yet supported for this version, therefore we will install the Python version 3.8 more recent. It can be found in this link https://www.python.org/downloads/release/python-386/.
We go down to the bottom of the link and choose the installer that interests us the most. For Windows suele ser Windows x86-64 executable installer and for MAC it is usually macOS 64-bit installer.

2Step:
Run the installer by opening it. This step is simple only, we have to accept the terms of use and conditions.
If you are going to install Python and MAC you can skip this step since these options are installed by default. Is IMPORTANT check the following boxes or SELECT the following options: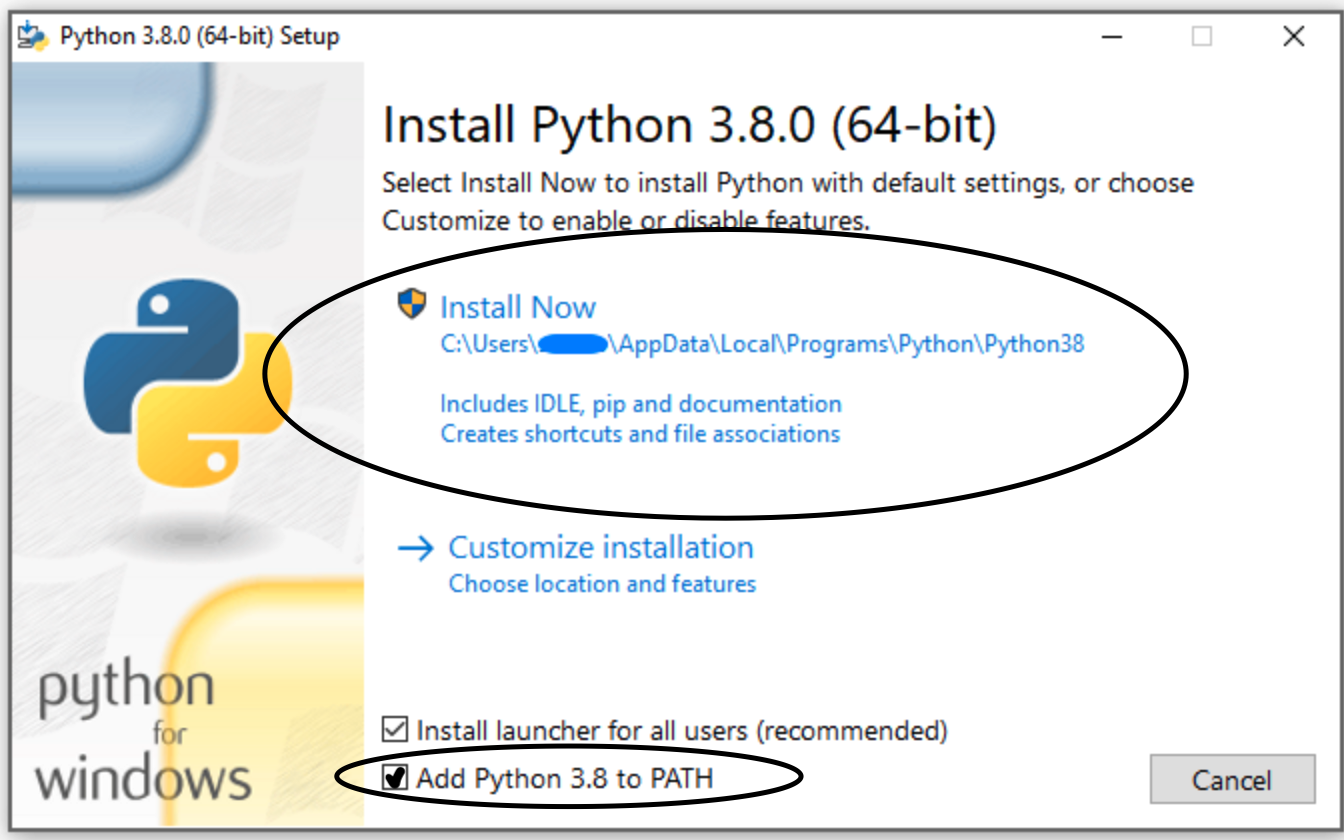
These options are important so that everything goes perfectly. The first makes it faster to run when installing it on the main disk drive and the second makes it possible to run Python from the terminal Windows.
3Step:
Once Python is installed we will check the installation of this, for it, We open the Windows or MAC terminal and execute the following:
python --version
If the console appears Python 3.8.6 everything is correct, if this does not appear to us exactly, we must execute:
python3 --version
The safest thing is that now we will appear Python 3.8.6. If they had to run python3 –version so that it turns out well then, from now on when they run python they should do it by always putting python3, the same will happen with the package installer, which will be explained below.
4Step:
The next step is to install a series of packages necessary for the proper functioning of Python.
We open the terminal and execute the following commands:
IMPORTANT: In the event that in the previous step you had to execute python3 now they will have to replace pip by PIP3, but only the first pip of each line:
Version for those who have worked python –version correctly
pip install --upgrade pip
pip install wheel
Version for those who have worked python3 –version correctly
pip3 install --upgrade pip
pip3 install wheel
5Step:
Then, It will explain the steps to install Jupyter Notebook, a very useful tool to develop code efficiently and perform multiple tests. They can skip it in case they are not interested, but Jupyter Notebook is the tool most used by Data Scientists for something.
We open the terminal and execute the following commands
Version for those who have worked python –version correctly
pip install notebook
jupyter notebook
Version for those who have worked python3 –version correctly
pip3 install notebook
jupyter notebook
As you can see the first command installs Jupyter Notebook and the second opens a Jupyter Notebook
For more information how to use Jupyter Notebook consult this tutorial: https://www.adictosaltrabajo.com/2018/01/18/primeros-pasos-con-jupyter-notebook/
6Step:
The next step is to install an environment project development / Python code. It is paso is very recommendable since a Data Scientist works based on projects and a good IDE (integrated development environment) is necessary to work efficiently.
The recommended development environment is PyCharm developed by JetBrains but it could be the one you prefer (Visual Studio Code, Sublime Text, etc..). It is HERE it is highly recommended as it is one of the best, it has multiple functions that will make our work easier and less repetitive.
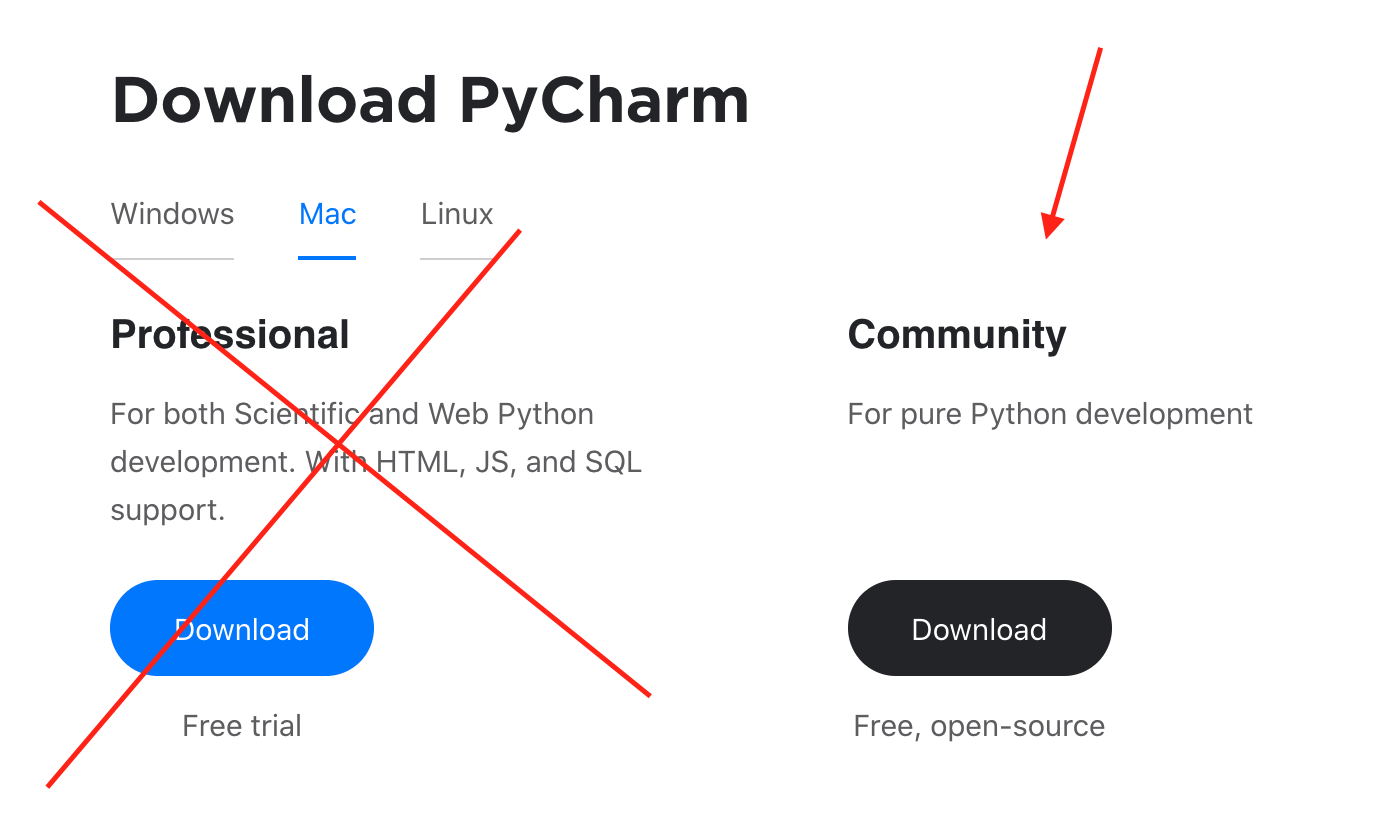
We can download it in the next link https://www.jetbrains.com/es-es/pycharm/download/
NOTE: It is important to download the version Community since the Professional is paid
Once downloaded we run the installer and configure it according to our priorities / preferences.
Then, It will be detailed how to configure it for correct operation, we recommend that you follow these steps.
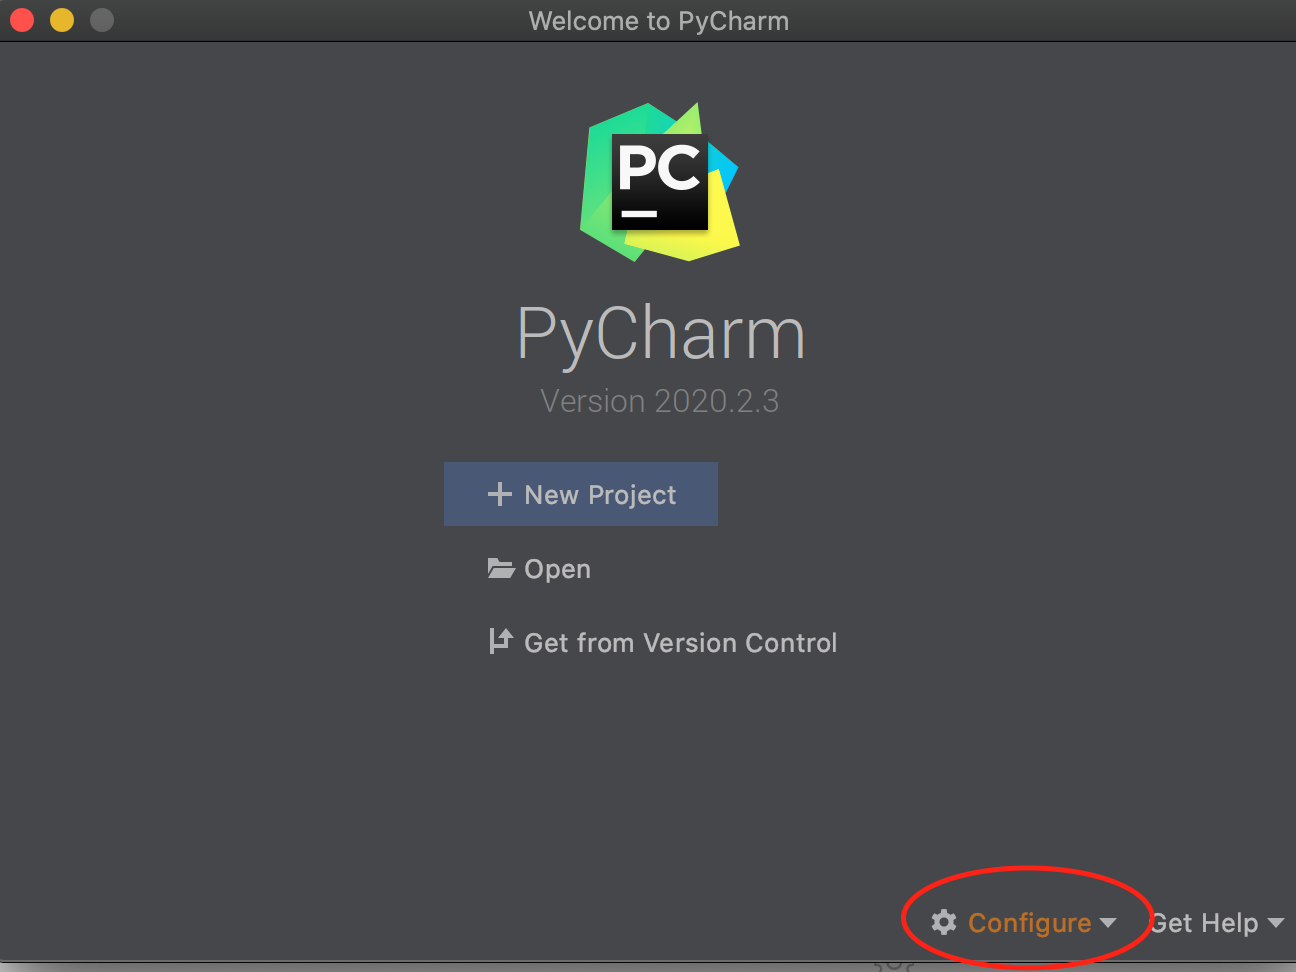
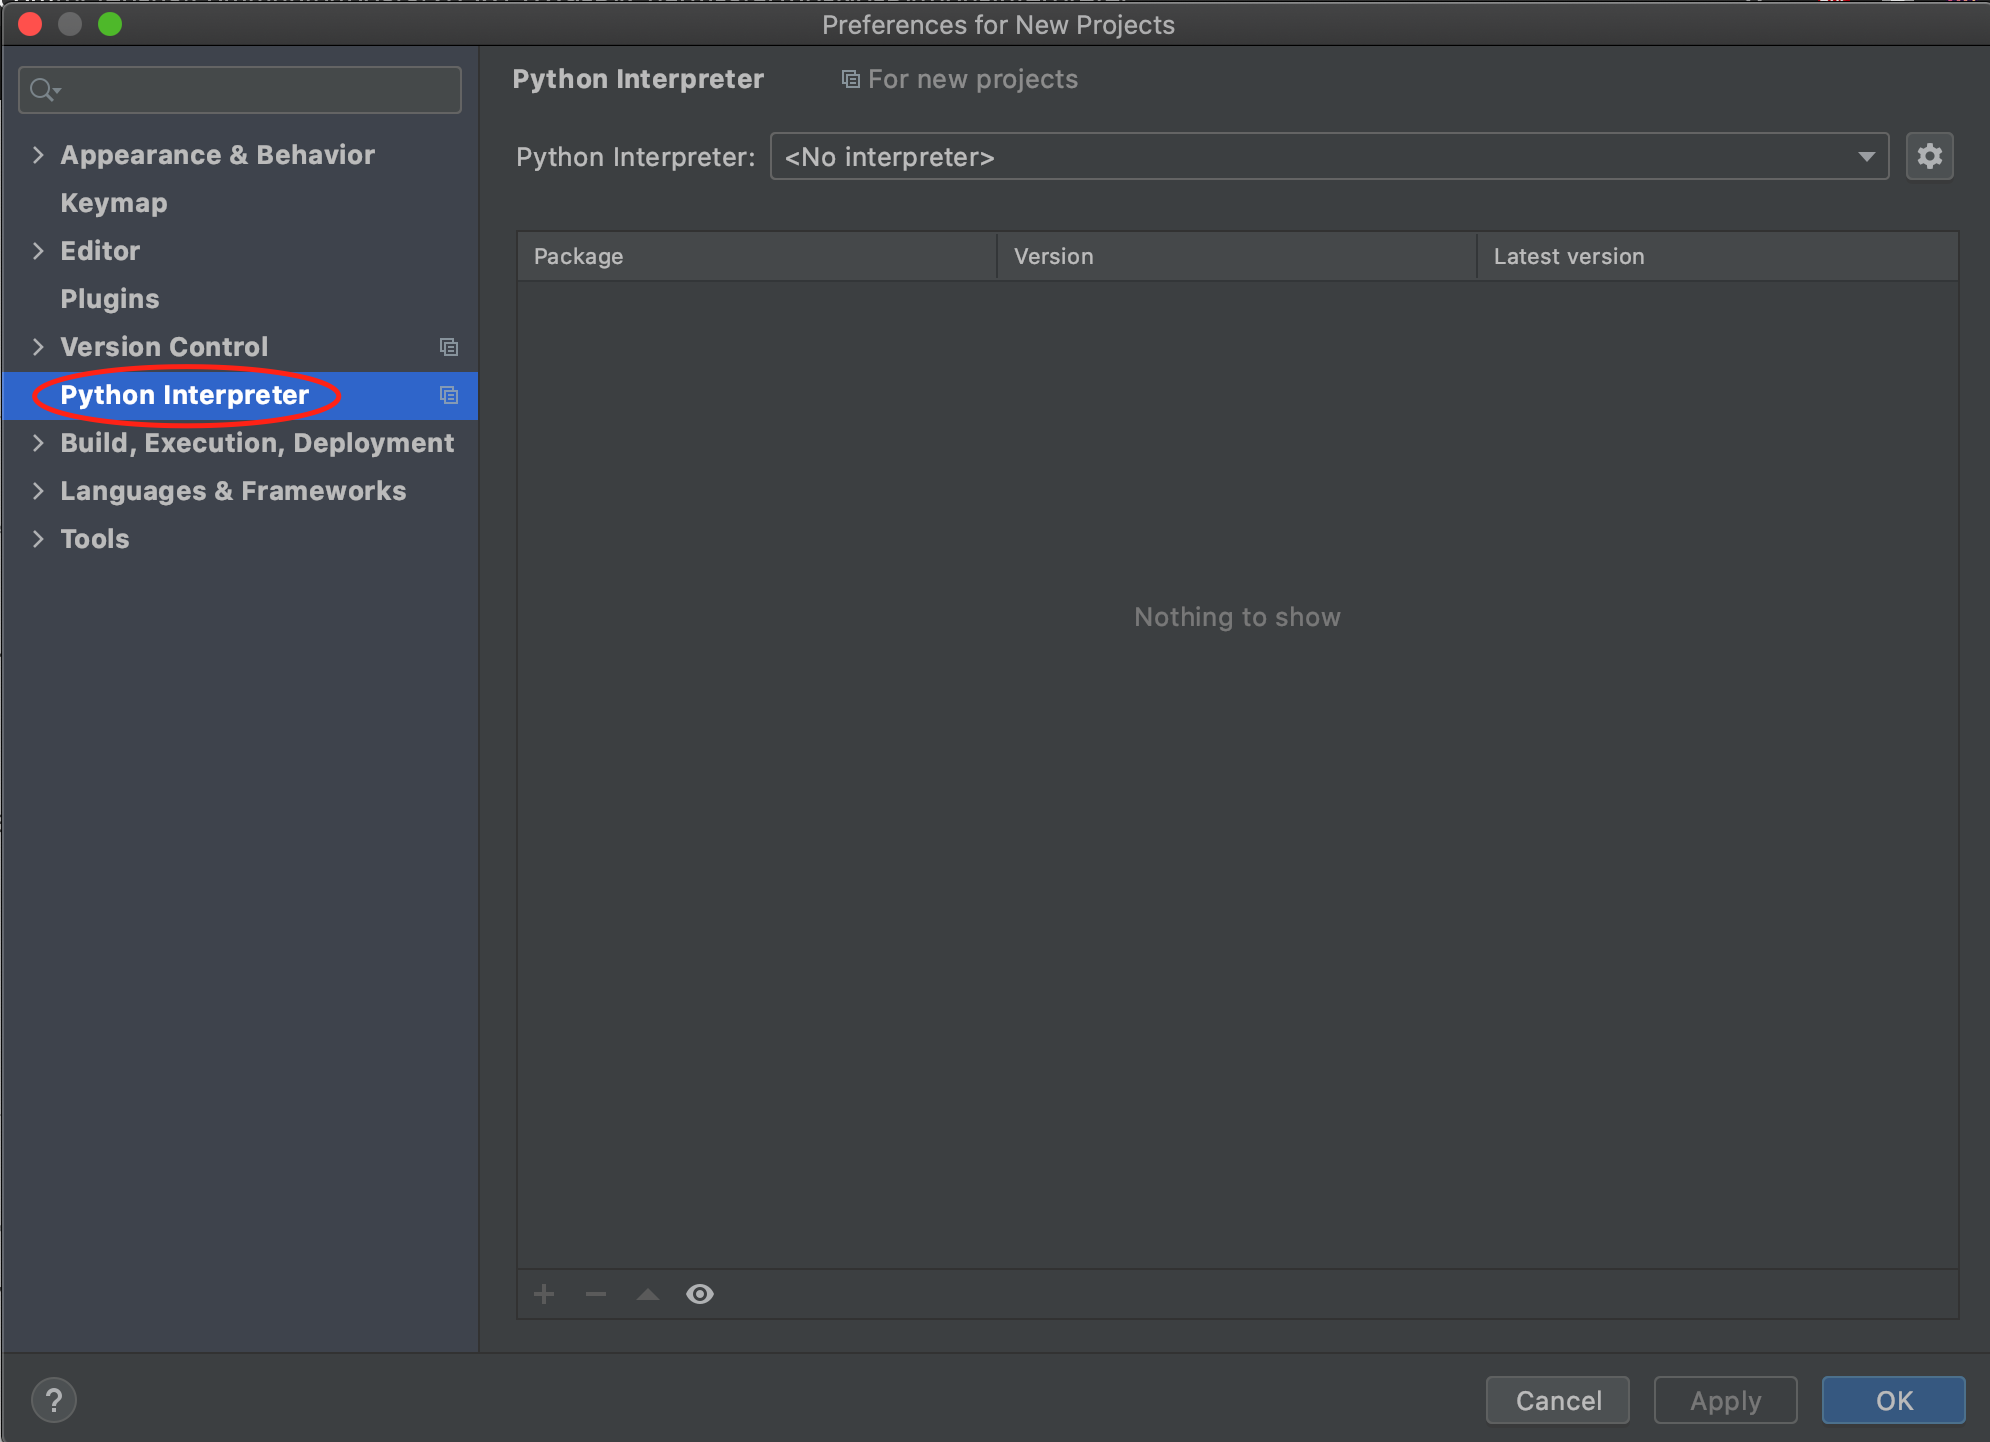
1. We open PyCharm and we click on the settings gear
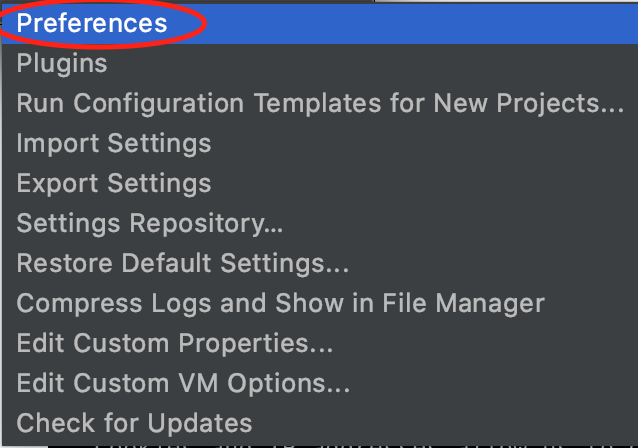
2. We click on preferences
3. We click on Python Interpreter
4. We click on the gear settings
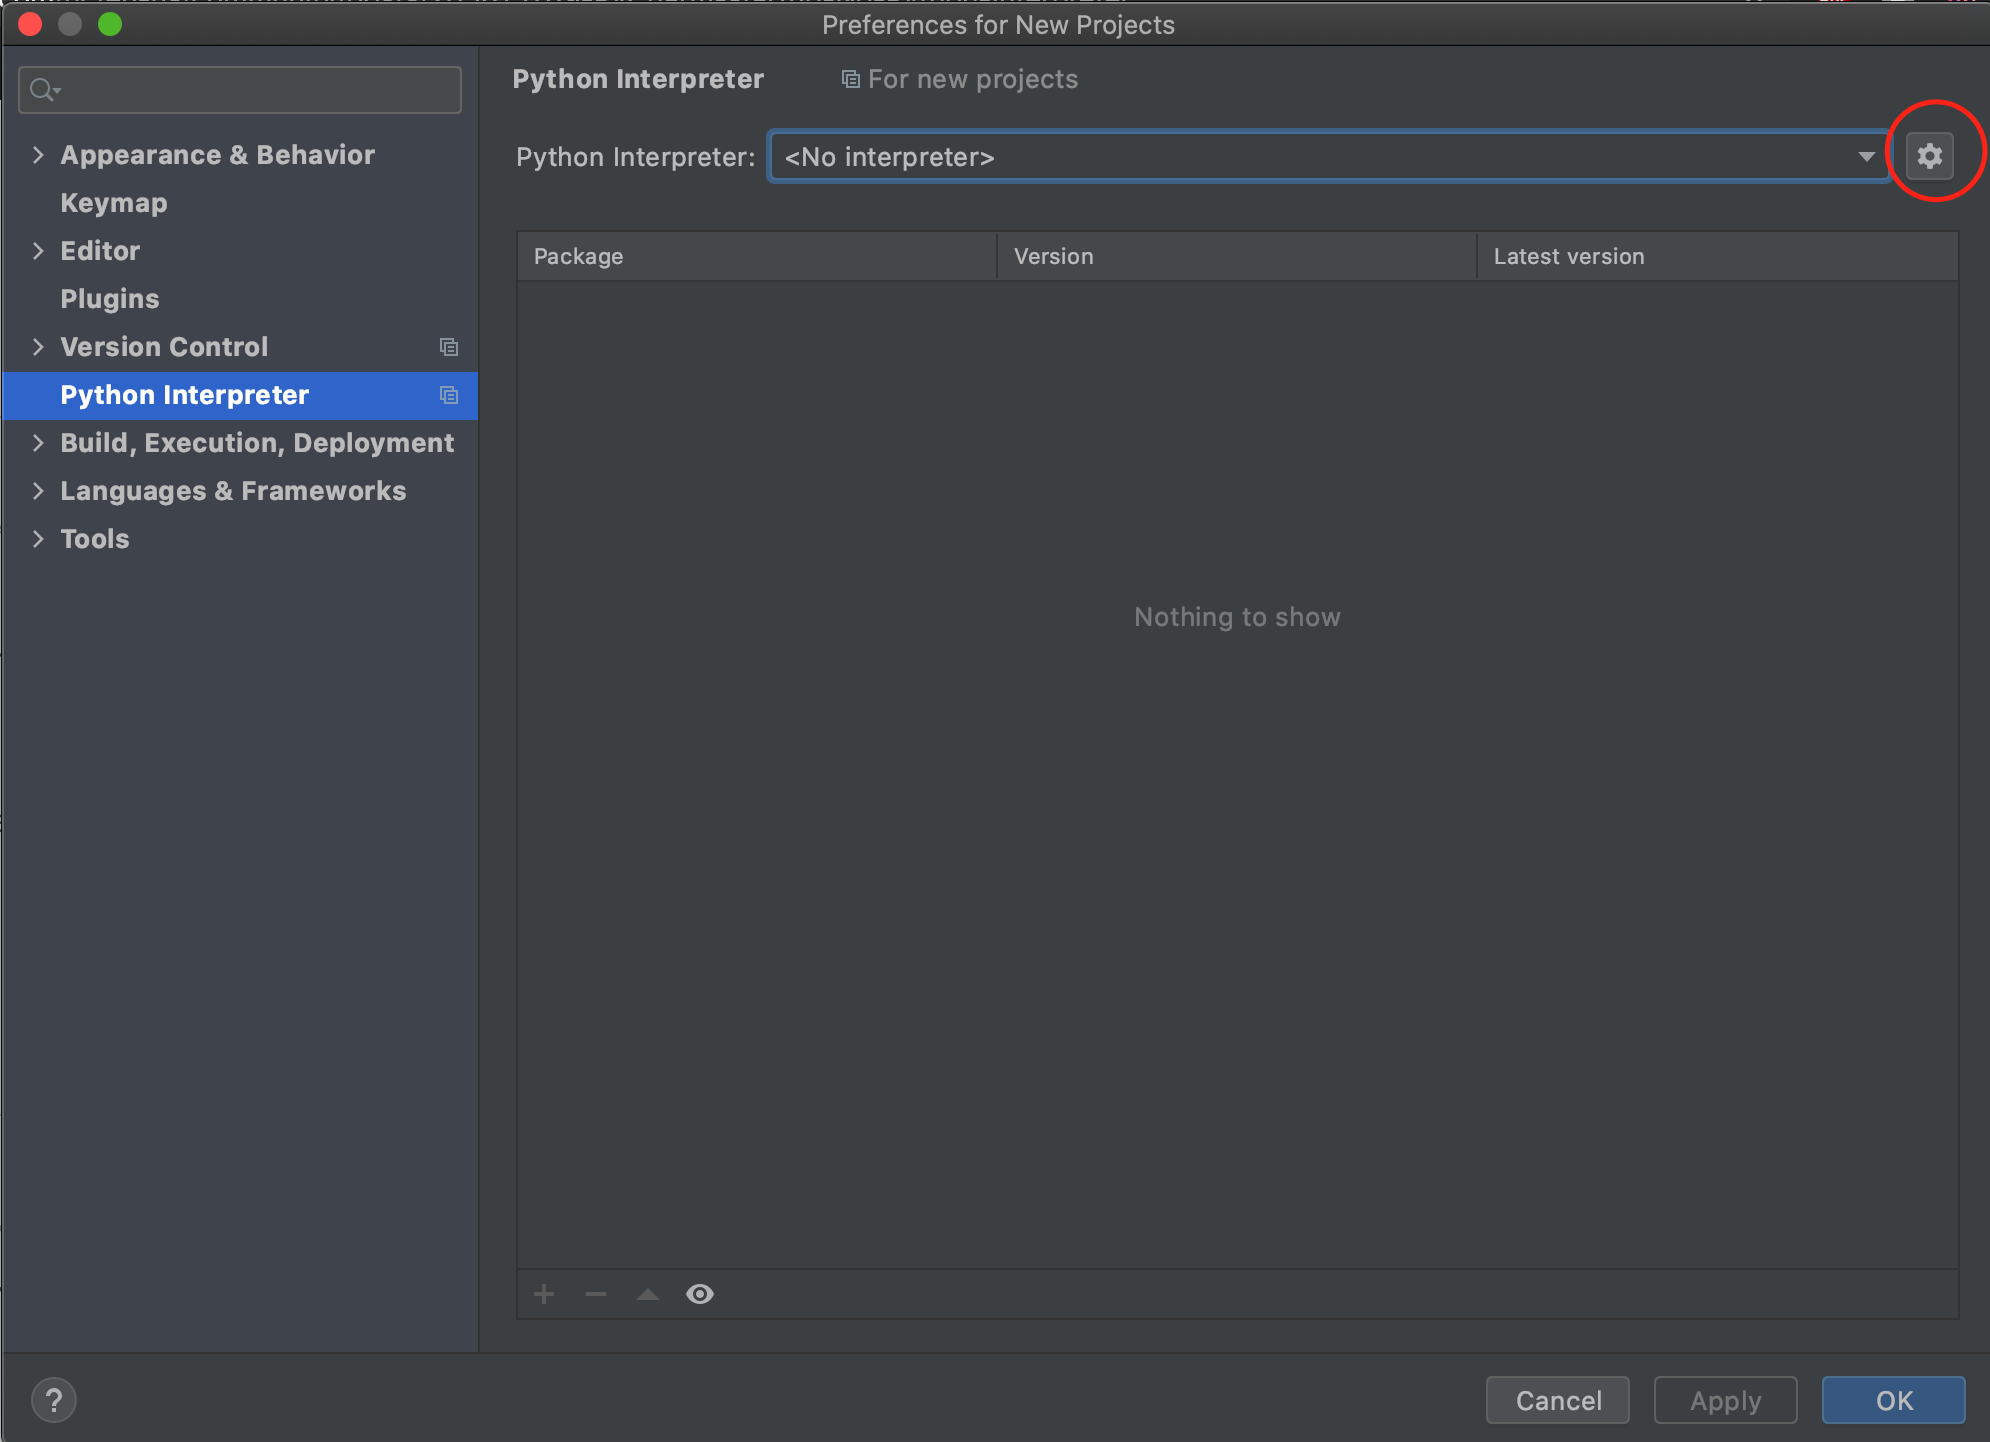
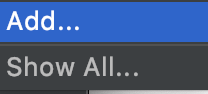
5. We click on Add
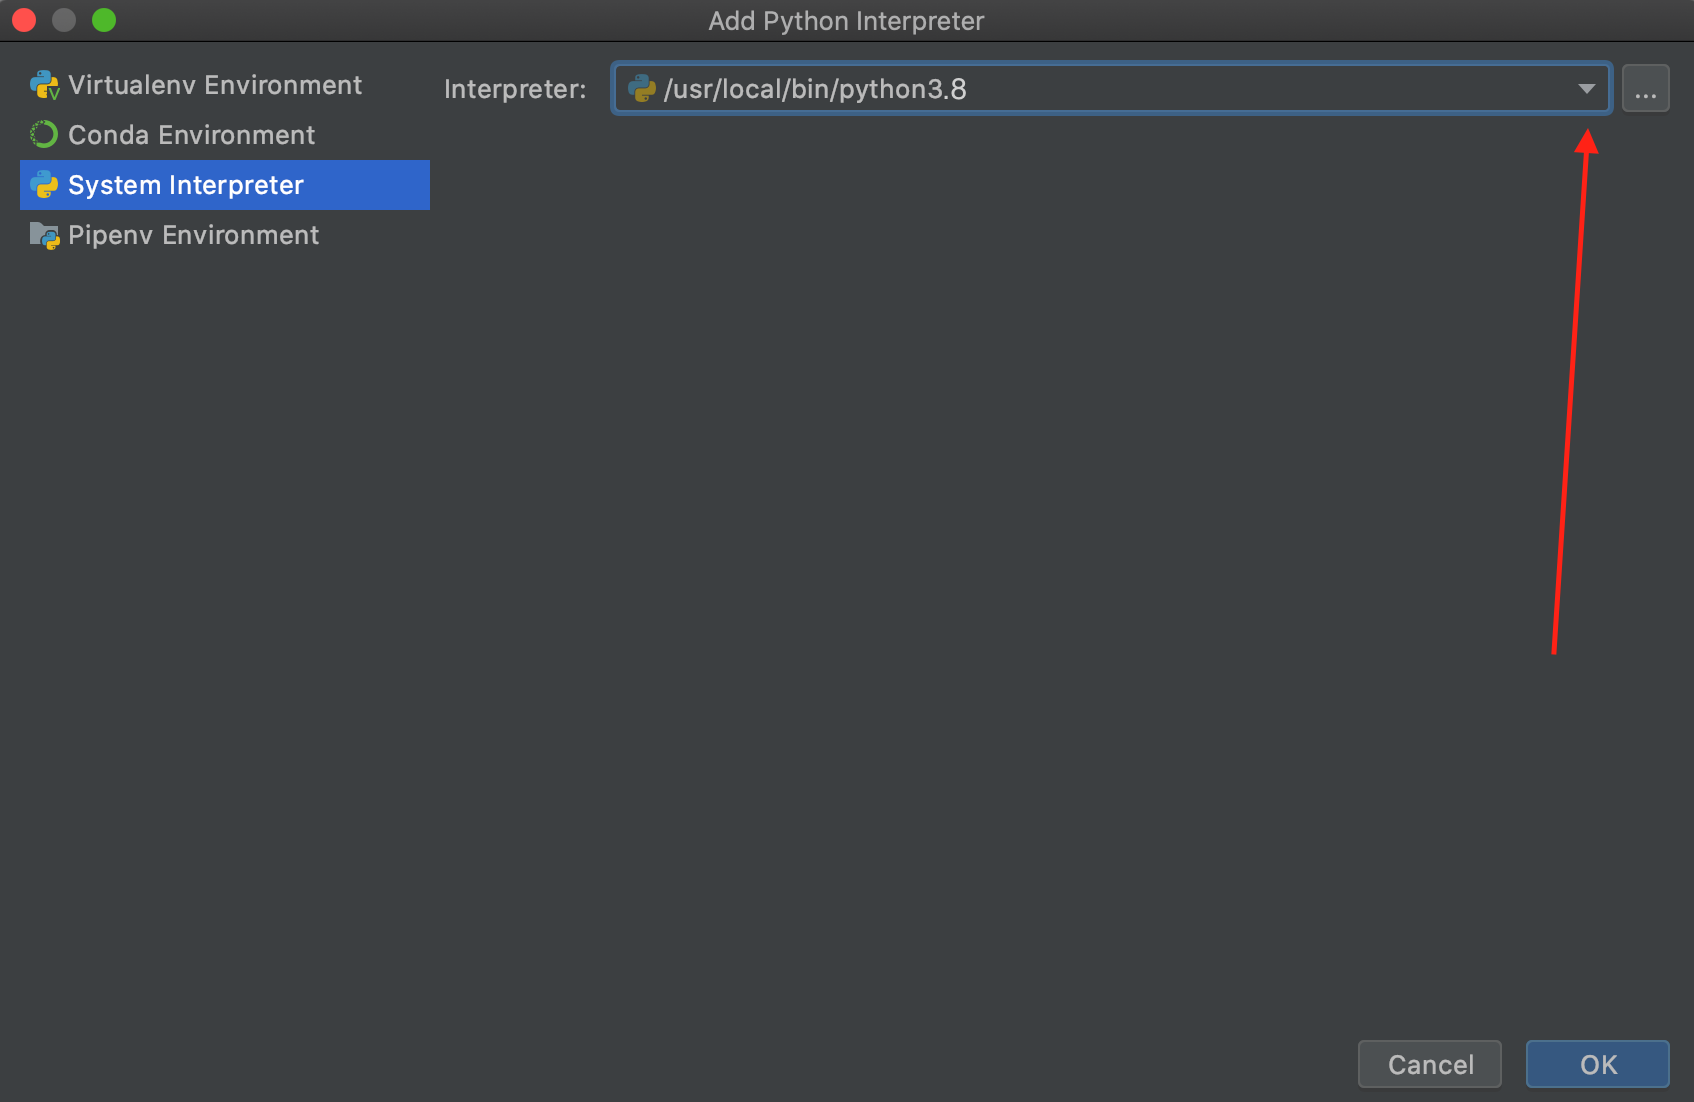
6. We click on System Interpreter
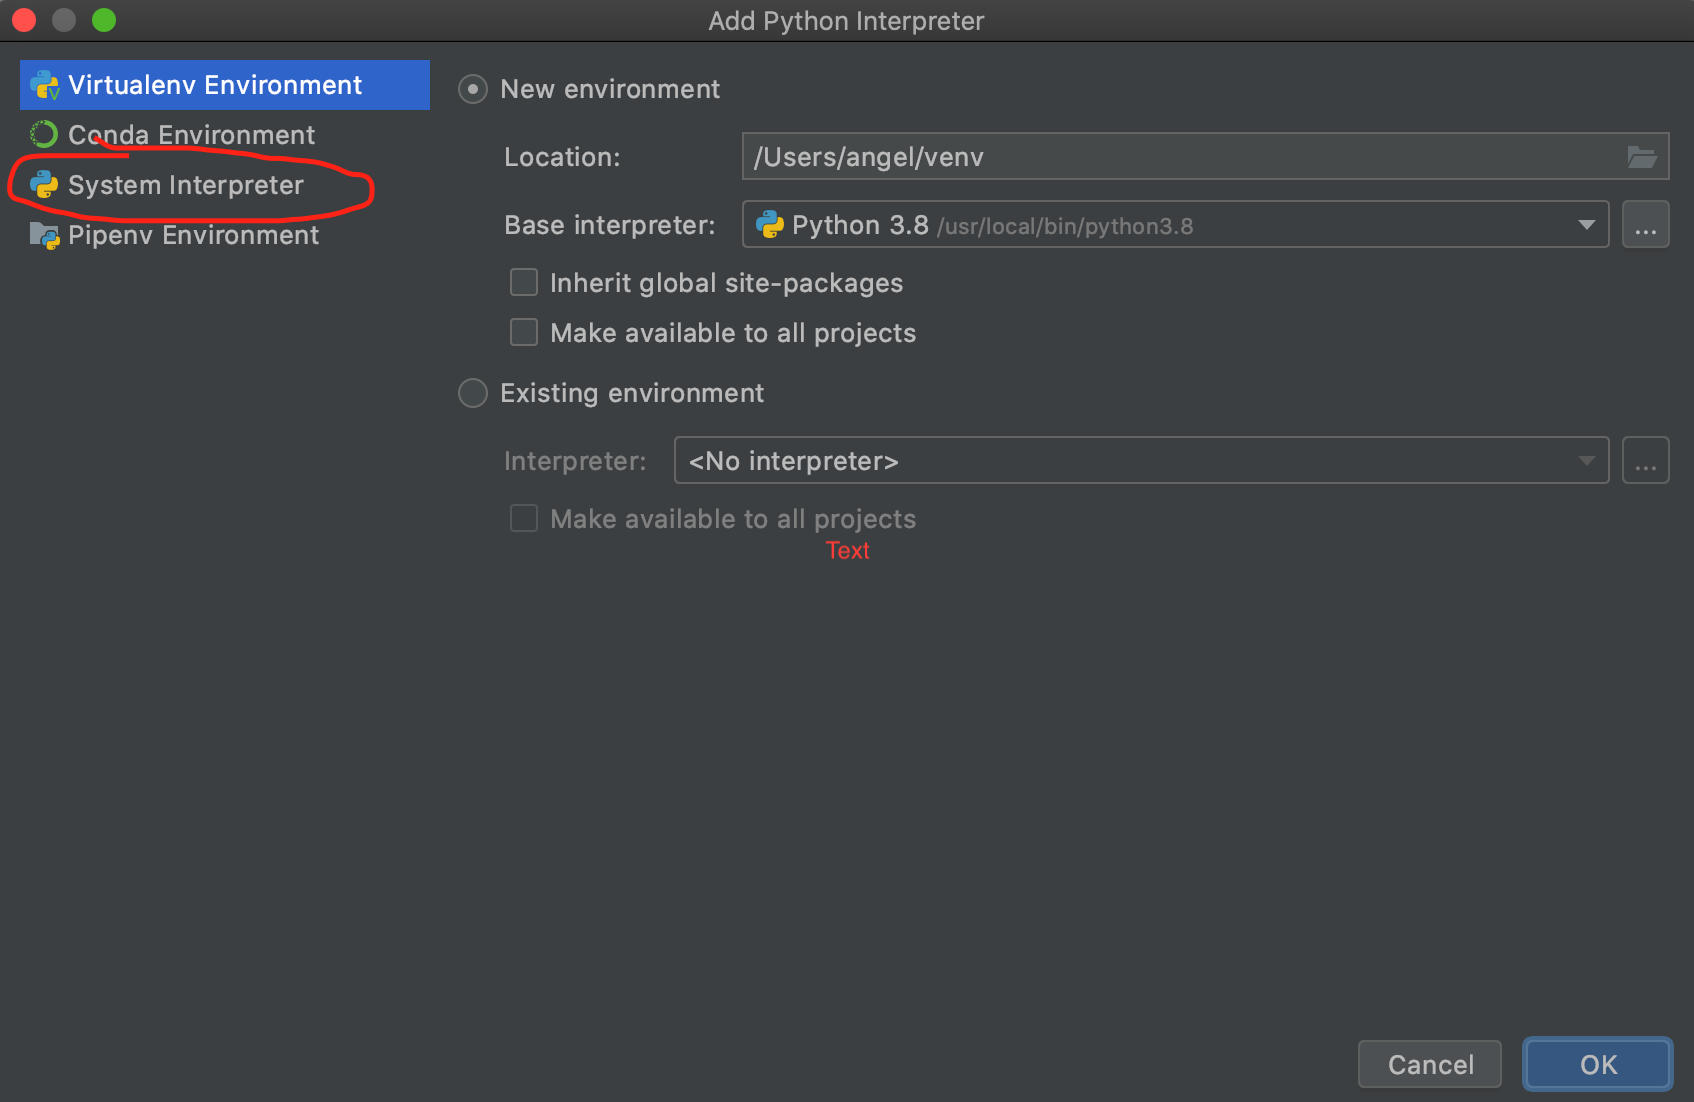
6. We click on the flechita, we chose the interpreter of Python 3.8 and we click OK
For more information on how to use PyCharm consult this tutorial: https://j2logo.com/python/tutorial-de-pycharm-en-espanol/
Note: In case you want to install new packages / libraries it is important to remember that depending on whether it has worked for you:
python --version    ---> Must use pip install PackageName

python3 --version   ---> Must use pip3 install PackageName
Also, in case you want to run python from terminal:
python --version  ---> Must use python

python3 --version ---> Must use python3
We hope you liked the tutorial and it has helped you to install Python oriented to Data Science. If you have any suggestions you can leave it in the comments.